I forgot to post a tutorial yesterday because it was my daughter's birthday. I guess I got a little caught up in the celebration of it, and the fun it was to watch her with her presents! So here is the tutorial that I was going to post yesterday.

1 1/2 tablespoons yeast
 Allow to rise in a warm place for 1 - 2 hours or until doubled in size.
 Divide dough into 3 equal parts. Roll each part into a 16 inch circle (1/2 inch thick). Spread 3 tablespoons softened butter onto circle, and cut into 12 equal pieces.
 Roll each wedge into a crescent, by starting at the wide end, and rolling it to the narrow tip. Place on a greased baking sheet with the tip tucked underneath.
Allow to rise in a warm place for 30 minutes.
 Bake @ 350 Degrees for 20 - 25 minutes or until tops are golden brown.
Makes 36 rolls.
(I occasionally make them a little bigger, and make chicken salad sandwiches, or turkey sandwiches with them. They are HEAVENLY no matter how you eat them!)

I doubt you will be able to resist eating one hot out of the oven! I know I can't!!!
Confession #2:
My husband thought it was silly to post a recipe on here when it really is more of a sewing/craft blog. My reasoning... I hope someone in the family sees how easy it is to make these rolls so they will make them for the next family dinner that I get invited to! (I can't think of a single dinner that we've been invited to that I haven't been asked to bring these to.)
So, since this is a sewing/craft blog... here's a second tutorial to make up for the cooking nonsense. ;)
Aspiring Artist's Clutch
 How cute is this???
 So easy to make! I had it totally finished in less than an hour - and that was with drawing up a pattern too!
Materials needed:
1/2 yard cotton fabric
10" x 8" coordinating cotton print
1" x 3" Velcro
coordinating thread
sewing machine
Cut out the following from the cotton print:
10" x 8" (cut 1)
Crayon pocket: 8" x 6" (cut 1)
Notebook pocket: 8" x 5" (cut 1)
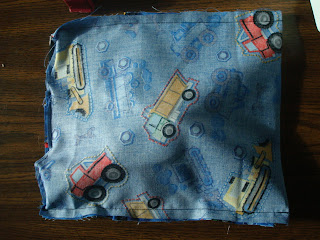
 Place the cotton print, and the coordinating cotton print together, and cut one 8" end so that it is curved slightly as shown below.
 Fold and iron the 6" x8" crayon pocket in half so it measures 3" x 8" Lay this so raw edges are even with the bottom edge of the main clutch, and sandwiched between the two main clutch pieces. (In the picture below, I have the top layer folded back so you can see the pocket....not trying to confuse you.)
 Placing right sides together, sew these two pieces together (8"x 14") sew a 1/2" seam around the outside edge, leaving a 4" opening at the bottom (straight 8" end) to turn right side out.
Clip corners, and around the curve every 1/4" and turn right side out,
 poking the corners out so they are square.
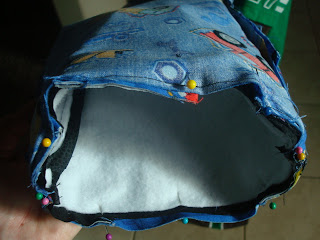
(here is what the inside should look like now)
 Sew a 3" strip of 1" wide Velcro 3" up from the bottom edge on the outside of the clutch.
 Press the pocket flat and make a mark every 1 inch to create the crayon pockets. Sew from the bottom of the pocket to the top, backstitch at each end,
 creating 7 pockets that hold 2 crayons each.
  Sew the pocket in place, sewing around 3 sides (closing the opening that you left open to turn it right side out) and leaving the top open to slide the notebook in.
 Here's how it should look now.
 Now, the only thing left to do is add a 4" x 6" notebook and 14 crayons or small markers.
 And be prepared for some amazing art work where ever you are.
This would be a great gift for any child! Especially because it can go ANYWHERE, and the crayons won't fall out. Church... car.... Dr's office... yep.... pretty much anywhere! This would go great with the Travel Pillow, or the Sunbeam Tote! Or maybe combine the three to create an awesome gift for a little kid who is preparing for a car trip that will last more than 30 minutes.
Confession 3#:
I love giveaways! And it's been a really long time since I hosted one! So, how about a giveaway!!! :)
This is for an Extra Large diaper clutch! Keep it for yourself or give it away as a gift, either way, these are AWESOME!!! Ask anyone who has ever bought one (or borrowed one) from me!
The diaper clutch holds 4-5 diapers and a reusable travel size wipes container. Made out of quality cotton fabric and vinyl. More info here!
 How to enter:
1 entry for being a follower
1 entry for posting about http://www.mudpuddlesanddaisies.blogspot.com/ on facebook or your own blog (include a link of my blog) - 2 entries if you do both of these!
1 entry for telling me your favorite Christmas tradition
Please leave a seperate comment for each. (Winner will be chosen December 20th)
Good luck!!!
And Thank you to all my followers - and everyone else who has visited my blog - for giving me someone to share my projects with through these last couple of weeks.
THIS GIVEAWAY IS NOW CLOSED


