
The First Tutorial of Christmas
While trying to come up with some kind of Advent Calendar to make this year, I ran across this one, and fell in love!
 So me, being the slightly crazy person that I am, I decided to make it. And, I am so glad I did because it actually turned out so cute... and was quite fun to make.
 The end measurements are 60 inches (tall) x 38 1/2 inches (wide)
Unfortunately, as I started making it, I wasn't sure I was going to do a tutorial on it, so I didn't take too many pictures. However, it was incredibly easy to make, so where the pictures are missing, I will explain, and I don't think you will have any problem figuring it out.
MATERIALS NEEDED:
Green felt
Green felt
Brown felt
Yellow felt
Felt in many different colors to decorate pockets.
Matching thread
Fabric for pockets (I used cotton in 7 different colors - mostly solids)
ribbons, pompoms, sequins, sew-on snowflakes, etc to add for fun decoration
D-ring (or ribbon to hang)
Sew-on numbers (or you can embroider them on)
sewing machine
Scissors
Pins
Step 1: cut out your felt pieces (The measurements below are including a seam allowance)
I made a huge pattern from newsprint, making sure it was symmetrical on both sides and looked the way I wanted it to before I cut anything out of felt. There is no way for me to draw you out a pattern that you could print off, but I can give you the dimensions on mine The tree measures 45 inches tall, and 39 inches wide (at the widest point) You can see how many pockets I fit across in each row - each of these pockets measure 3 inches x 4 inches. That should help you get an idea on the width.
 The trunk measures 12 inches tall. the top width of the trunk is 3 inches, the bottom width is 6 inches (the bottom of the trunk is curved)
The star measures 10 inches across/tall ( I sketched a slightly lopsided on on a piece of paper and transferred it to the felt... it isn't perfect, but I love it that way)
Step 2: Sew felt pieces together.
Sew a 1/4 inch seam around the outside edge of the trunk with right sides together. Leave a 4 inch opening, turn right side out, and sew around the outside edge, closing the 4 inch opening as you go, as shown below.
Sew a 1/4 inch seam around the outside edge of the trunk with right sides together. Leave a 4 inch opening, turn right side out, and sew around the outside edge, closing the 4 inch opening as you go, as shown below.
 Place right sides of tree together and sew the same way you sewed the trunk. Make sure you pin all over the tree before you begin sewing to keep the felt from shifting as you sew. Leave an 8 inch opening at the bottom where the trunk will be to turn the tree right side out.
 After the tree is turned right side out, make sure all the corners are poked out before you sew the top stitch around the edge, and pin the trunk into place. Sew top stitch around the outside edge, sewing in the trunk, and closing the 8 inch opening.
Sew the star in the same way, leaving the bottom open to turn, and creating an opening where the star will fit over the top of the tree. After you have turned the star right side out, fit it over the top of the tree and sew the top stitch around the outside edge, closing the opening, and attaching it to the tree top.
 Step 3: Cut out and sew pockets.
Each finished pocket will measure 3 inches (wide) x 4 inches (tall) You could make these pockets out of felt, I made mine out of cotton, and folded the fabric in half so it would be 2 layers thick. I cut rectangles that measured 9 inches x 4 inches, folded them in half (so they measured 4 1/2 inches x 4 inches), and sewed along both long sides as shown below.
(It doesn't matter how you decided to make the pockets- or what they are made out of, as long as the end measurements are the same)
 Turn pocket right side out, and press, folding the open end in 1/2 inch. (I didn't sew this opening closed until I sewed them onto the tree.)
 Step 4: Decorate the pockets.
This was the fun part for me. Try using ribbon, trim, pompoms, felt, pretty much anything to create fun designs or pictures to each pocket. (make sure you plan for the fold to be the top of the pocket, and the pressed opening to be the bottom.)
 The ribbon was super simple, and I love how it turned out.
 I also tried making a few animals, ice skates, a snow man, Santa clause, etc which you can see on the finished picture. These took a little more time, but turned out cute in the end. I didn't use patterns, I just sketched mine and then cut them out of the felt, however it isn't hard to find ideas or even cut out shapes and patterns on the Internet.
Step 5: sew each pocket to the tree.
After you have each of your pockets decorated, pin them to the tree, making sure they are all evenly spaced.
 ... and sew around three sides, leaving the top open, and closing the bottoms that have been pressed under.
 Step 6: Add decorative snowflakes to the tree if desired. ( I got mine at Joann's for $.99 they were just the simple sew on felt kind)
 Step 7: Sew on the numbers.
 Step 8: Sew on the D-ring hanger, or make a loop with a ribbon and attach it to the back of the star.
 Fill each of the pockets with candy, gifts, toys, etc, and let the count down to Christmas begin! :)
 ... and sew around three sides, leaving the top open, and closing the bottoms that have been pressed under.
 Step 6: Add decorative snowflakes to the tree if desired. ( I got mine at Joann's for $.99 they were just the simple sew on felt kind)
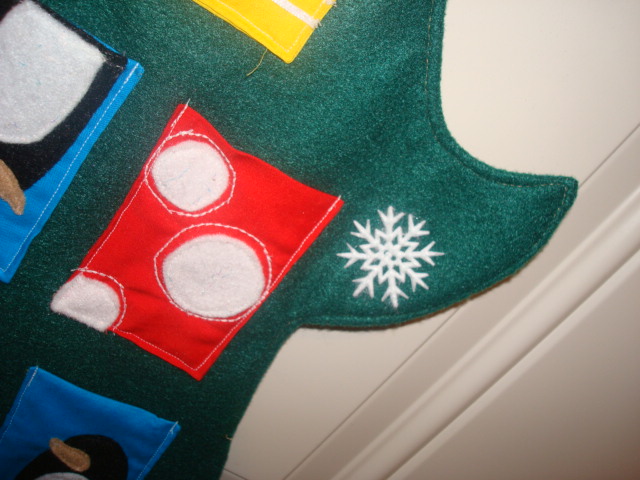 Step 7: Sew on the numbers.
 Step 8: Sew on the D-ring hanger, or make a loop with a ribbon and attach it to the back of the star.
 Fill each of the pockets with candy, gifts, toys, etc, and let the count down to Christmas begin! :)


How terribly cute! I love that each pocket is different. It looks like it must have taken forever with all the creative touches you add it! Definitely something to be proud of. Thank you so much for linking up to Homemade Christmas!
ReplyDelete