
The Ninth Tutorial of Christmas
Bringing you just a smidge of this cuteness!

I cant give you the whole thing because the cutest part - that adorable little model - is mine. :)

But the pants..... that's the part I am giving you today!
It is a tradition in our family that I make everyone a pair of comfy flannel pajama pants for Christmas! We open our pajamas Christmas Eve night, and wear them when we open presents on Christmas morning. I think it is one of my favorite traditions, and I LOVE making them!
Last year I made matching ones... this year I let everyone choose what fabric they wanted.
Because kids grow so fast every couple of years you would have to buy a new pattern if you went with the pattern approach. I, however NEVER use a pattern! These pajama pants are so simple, that if you have a pair of pants that fit just the way you like them to... that is all you need!
(and a sewing machine, 1 yard of flannel - for a size 2-3T, and 1 inch elastic)
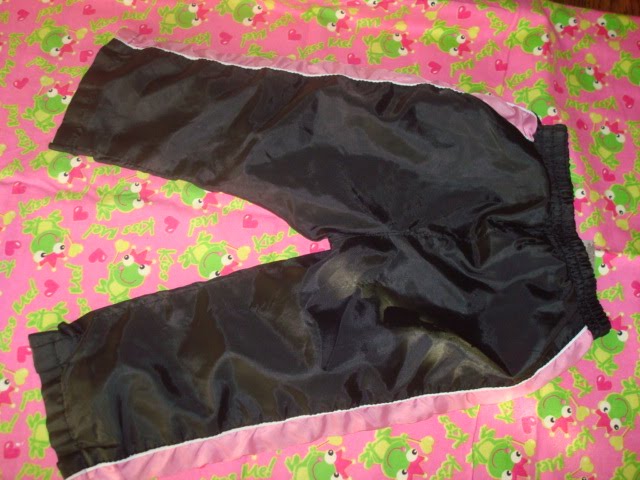
Today I am showing you how I made Taysia's (Size 2T)!
We will be sewing 1/2 inch seams throughout.
I started with a pair of pants that fit her perfectly (meaning they aren't going to be too small in 3 months).
And 1 yard of frog princess flannel.
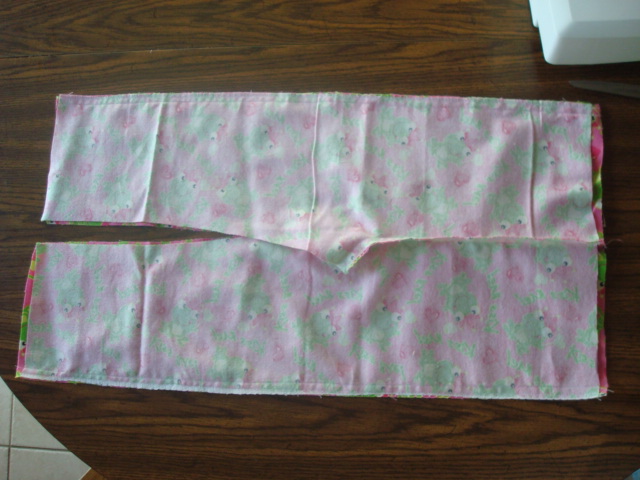
 Start by turning the pants wrong side out so you can see where the seams are. Then, laying them flat (take the time to remove all the creases and wrinkles or you will cut the flannel wrong), pin them to the fabric (fabric should be folded in half so you can cut 2 at a time) and cut around the pants.
THE OUTSIDE EDGE OF THE PANTS SHOULD BE LINED UP STRAIGHT ON THE GRAIN OF YOUR FABRIC. IF IT IS NOT STRAIGHT THE PANT LEG WILL TWIST AROUND WHEN YOU WEAR THEM
CUT 1/2 INCH BIGGER THAN THE PANTS FOR A SEAM ALLOWANCE
CUT 2 INCHES LONGER THAN THE BOTTOM HEM (the two inches will be folded up for the hem)
CUT THE WAIST BAND 2 INCHES TALLER THAN YOUR PANTS (the two inches will be folded down over the elastic)
MAKE SURE IF YOU HAVE A FABRIC WITH A PRINT THAT HAS A RIGHT SIDE UP THAT YOU PIN AND CUT ACCORDINGLY.
Tip: make sure all your seams are pulled out flat (you are cutting around the SEAMS of the premade pants, not just the outline) and stretch the waist band so you get the actual width for the waist, not the scrunched up version that the elastic has made.
 Cut 2 of the front, and 2 of the back.
The crotch is the most important area not to mess up, but if you follow the seam in the pants you cut around it should turn out fine.
The back of the pants has a more scooped crotch than the front (it has to fit around the bum)
(you can see the difference in mine below. The front of the pants is on top, and the back is on the bottom... notice the difference in the scoop?)

TIP: MAKE SURE YOUR LEGS ARE THE SAME LENGTH FOR THE FRONT AND THE BACK BY MEASURING THE FIRST ONE YOU CUT OUT ONTO THE SECOND ONE BEFORE YOU CUT IT.

Cut 1 tie that is 2 inches x 10 inches
(if you want a draw string waist I will show you how to make that later)

Placing right sides together, pin and sew the front sides together starting at the top of the waist, and sewing to the crotch. (I serge or zigzag the edges first as you can see in the picture, but you may want to sew your 1/2 inch straight seam first as it is easier to tear a straight stitch out, rather than a zigzag.... your choice)
 Sew the back pieces together in the same way, sewing from the waist to the crotch. (make sure you always back stitch at the beginning and end of every seam!)
 Now sew your 1/2 inch seam (or zigzag your edges if you already sewed your straight stitch - it really doesn't matter what order you do this)
Tip: I find it helpful at this point to pin a safety pin in the back so I don't mix up the front and the back later on.

Open both of the pieces (front and back) that you just sewed, and placing right sides together, pin the crotch seams so they line up.

Once you have this pinned, pin the side seams, and sew a 1/2 inch seam down each side. Zigzag or serge to finish the edges.
Pin the inner leg seams, starting at the crotch, and going down each leg (so that your crotch seams match up). Then sew 1/2 inch seam, and zigzag to finish edges.

Taking your strip that you cut for the tie, press the edges to center.

Fold in half again and press, then sew along the edge as shown below.
 Then sew along the other side in the same way.
OPTION 1 FOR WAISTBAND:
(This waistband is elastic all the way around with a fake drawstring in the front. It is not adjustable, but works GREAT for kids because it is SUPER EASY to make.
(it really serves no purpose, except to look cute, and it makes it easy to tell which is the front, and which is the back of the pants.)
Cut a piece of elastic to fit around the wearer's waist. ( I make mine just long enough so that the ends are about an inch from touching without being stretched.)
Overlap 3/4 inch and sew the ends together, making a complete circle with the elastic. (make sure you sew over this a lot so it doesn't break the seam when it is stretched.)
 Fold the elastic in half and mark the halves with a permanent marker.
Overlap 3/4 inch and sew the ends together, making a complete circle with the elastic. (make sure you sew over this a lot so it doesn't break the seam when it is stretched.)
 Fold the elastic in half and mark the halves with a permanent marker.
Open and fold the half marks to center, to mark the quarters.
 Now pin each of these marks to one of the seam on the waist of the pants by folding the top of the pants over the elastic 1/2 inch.
 Roll the elastic down one more time and pin again, keeping the marks on each of the seams.

Sew around the elastic at the bottom (about 1/4 inch into the elastic). Make sure you stretch the elastic to the max that the fabric will allow while you sew.
 Now pin each of these marks to one of the seam on the waist of the pants by folding the top of the pants over the elastic 1/2 inch.
 Roll the elastic down one more time and pin again, keeping the marks on each of the seams.
Sew around the elastic at the bottom (about 1/4 inch into the elastic). Make sure you stretch the elastic to the max that the fabric will allow while you sew.
Tip: it is helpful to make sure your needle is down in the fabric every time you stop so that your fabric doesn't slide backward when you start sewing again.


Find the center of the tie, and sew it to the front of the pants, then tie in a knot or bow (whatever your preference) and trim the ends. You can either knot the ends, or you can do like I did and sew across 1/2 inch from the bottom of each end, and then snip to fray then ends.

Once you have sewn all the way around the bottom of the elastic, sew all the way around the top. Sew about 1/4 inch down from the top to make sure you catch the edge of the elastic the whole way around.

Find the center of the tie, and sew it to the front of the pants, then tie in a knot or bow (whatever your preference) and trim the ends. You can either knot the ends, or you can do like I did and sew across 1/2 inch from the bottom of each end, and then snip to fray then ends.
(Don't like this idea for the waistband? More waistband options at bottom of this tutorial... because everyone in the family seems to like theirs a little different. )
 Fold the hem of each pant leg up 1/2 inch, and then again 1 inch more and pin.
 After both legs are pinned, lay the pants out, and fold in half (front being folded on the inside).

Sew the hem, and try them on for size.

Hopefully they fit just the way you want!!!

 Sew a button hole big enough to thread your ribbon, or tie through. I make my button hole 1/2 inch which is 99.9 % of the time the perfect size.


 Fold the hem of each pant leg up 1/2 inch, and then again 1 inch more and pin.
 After both legs are pinned, lay the pants out, and fold in half (front being folded on the inside).
 Making sure the waistband is lined up,

and the crotch seam is pulled out straight, make sure that the pant legs are the same length after you have pinned up the hem. If not, adjust accordingly before you sew so that they are exactly the same length.

and the crotch seam is pulled out straight, make sure that the pant legs are the same length after you have pinned up the hem. If not, adjust accordingly before you sew so that they are exactly the same length.

Sew the hem, and try them on for size.

Hopefully they fit just the way you want!!!

OPTION 2 FOR WAISTBAND:
(This is my personal favorite because it is adjustable with the drawstring, but you don't have to untie it because the elastic provides the stretch you need in the back. I also like this because I hate poochy pants in the front, and it seems like that's what they always turn out like with elastic that goes all the way around. This creates a flat, fitted front.)
On the center of the front pieces (After you cut them out, but before you sew any seams on them), mark a spot for a button hole on each - give or take 1 1/2 inches in from center edge, and 2 inches down from top as seen below.
 Sew a button hole big enough to thread your ribbon, or tie through. I make my button hole 1/2 inch which is 99.9 % of the time the perfect size.
Slit the center of the button hole you created to make the hole.

Create a tie like shown in OPTION 1 FOR WAISTBAND above, or use 1/2 inch width ribbon. For this version you will only need enough length to go half way around the waist, plus enough to tie the ends (+/- 10 inches on each end) Cut the tie in half.
Cut a piece of 1 inch elastic long enough to go half way around the wearer's waist. Sew one length of tie or ribbon to each end of the elastic. Make sure you sew over this multiple times so the stitches don't break when it is stretched.

Mark the center of the elastic and pin this to the center back seam of the pajama pants. (Fold the waistband down 1/2 inch over the elastic, then roll the elastic down again, completly hiding the elastic.)

Pin the seams where the elastic joins each of the tie ends to each of the side seams in the pants, and continue folding and pinning down the waistband the rest of the way around, folding over the ties, and poking the ties through the button holes in the front. Make sure there aren't any twists in the elastic or ties.

Sew around the bottom of the elastic, stretching as you go, and making sure you catch the edge of the elastic. Continue sewing all the way around, creating a casing for the tie. MAKE SURE YOU DON'T SEW OVER THE TIE, OR YOU WON'T BE ABLE TO ADJUST IT!

Sew around the top of the elastic (about 1/4 inch down from the top of the waistband) but STOP when you get to the side seams. You only need to sew this seam where the elastic is, not where the tie is.
Tie it!
 Love them! Even with my hugely pregnant belly, I LOVE THEM!!!
 Love them! Even with my hugely pregnant belly, I LOVE THEM!!!
(Notice how long these are on me? You would be amazed how much they shrink if you buy cheap flannel. They are a lot better with good quality flannel, however, if "short pants" are one of your biggest pet peeves like they are mine.... make them long enough that even if they shrink they will still be long enough.) :)
Option 3 for Waistband:

This is my husband's personal favorite! This is the version of an elastic waistband, with a drawstring that goes all the way around.
Step 1: Make the button holes exactly like you did for Option 2.
Step 2: Sew the elastic into the top of the pants exactly like you did for option 1.
Step 3: Sew a 2 1/2" wide x (distance around the waist plus 20") strip of fabric into a tie as shown in option 1.
Step 4: Connect one end of the tie to a large safety pin and thread it through one button hole, around the waistband, and out the other button hole.
Tie it.


No comments:
Post a Comment